
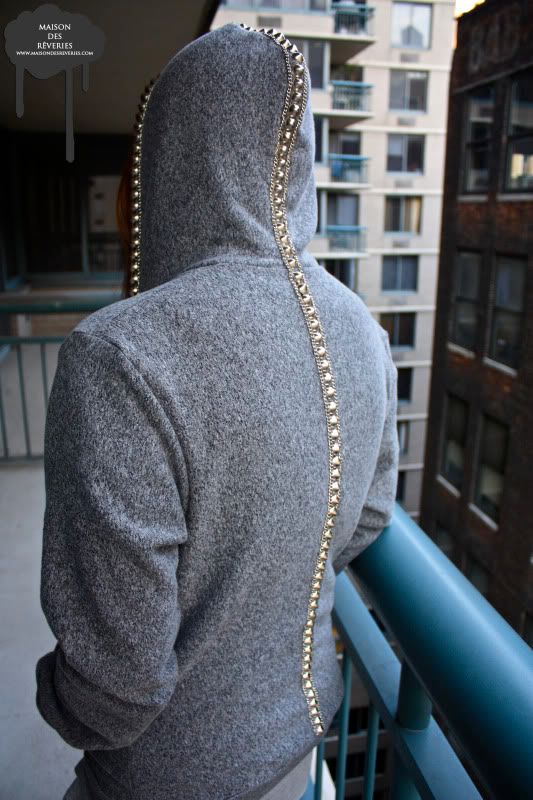
One of my favorite things to throw on under a leather vest or jacket is a hoodie - perfect for those days when it's a little chilly out but not cold enough for a coat, or you just want to be a little incognito under your hood. I decided to amp up my go-to AA hoodie with some studs and chains and after seeing the finished result, I've decided it's totally taken on a personality, like the former's bad-ass long lost twin. Plus, giving new life to old basics is really good for my shopping detox. Here's how I did it:

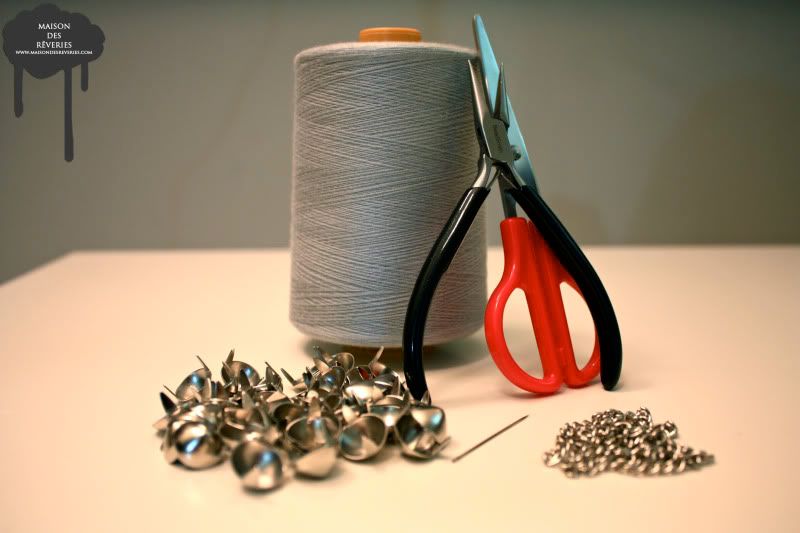
What you'll need: Grey thread, Needle, Pliers, Scissors, 1/2" cone studs, silver chain, ruler, white chalk pencil or tailor's chalk. Try to use a chain that has links thick enough to thread a needle through.

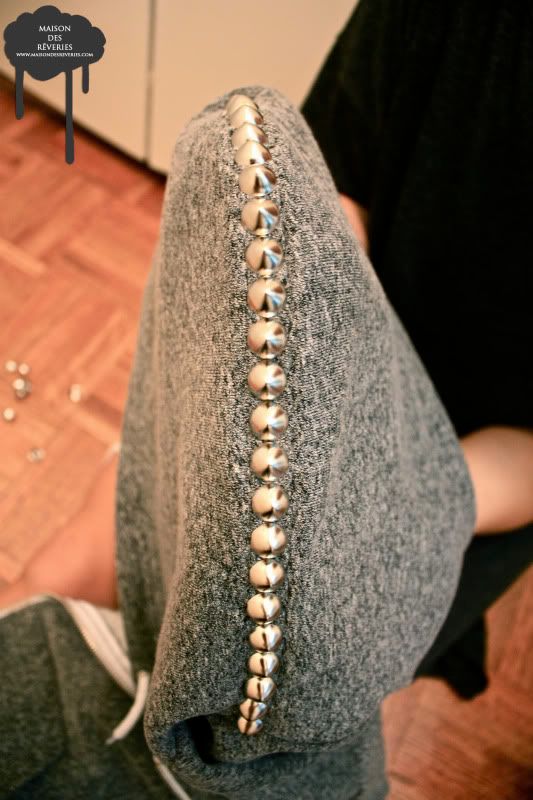
Step one: Using the middle seam of the hood as your guide, stud along those lines down the middle of the hood and try to maintain as straight of a line as possible.

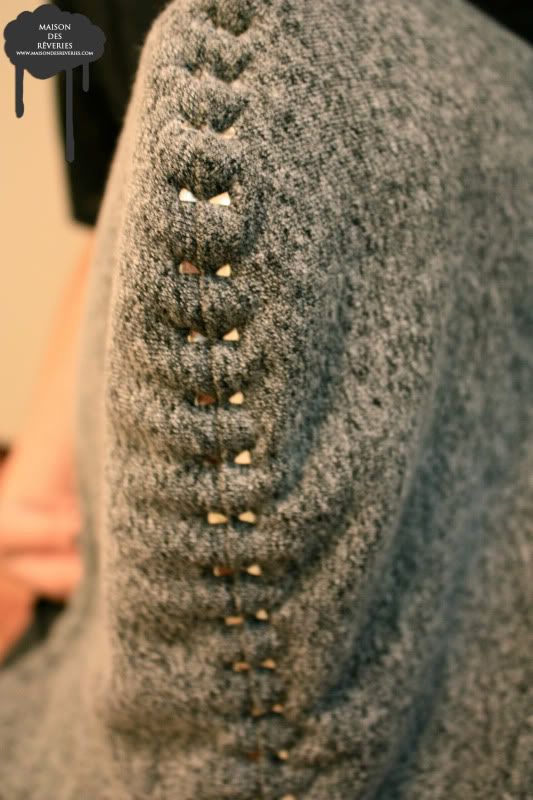
Step two: The inside of the hood should look something like this.

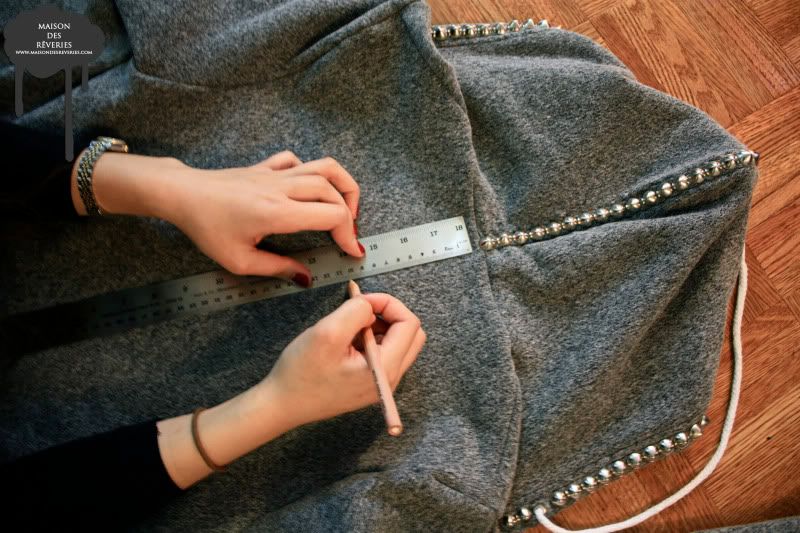
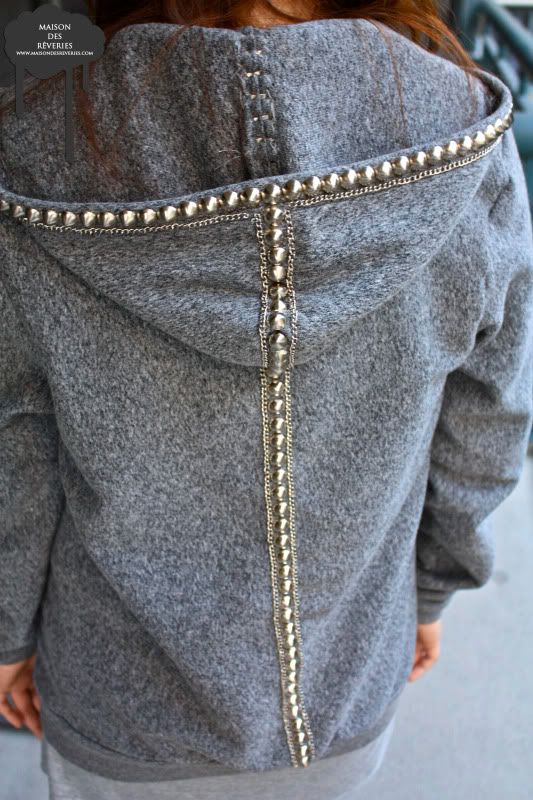
Step three: Stud along the sides of the hood that frame the face. Follow the already sewn seams to help you keep a straight line. Once you have completed studding the hood, grab a ruler and either tailor's chalk or a chalk pencil and using each side of the studs on the hood as a guide, draw two lines that run straight down the entire back. These lines should form one long column. I would advise making these lines as visible as possible as they are imperative in being able to stud in a straight line.

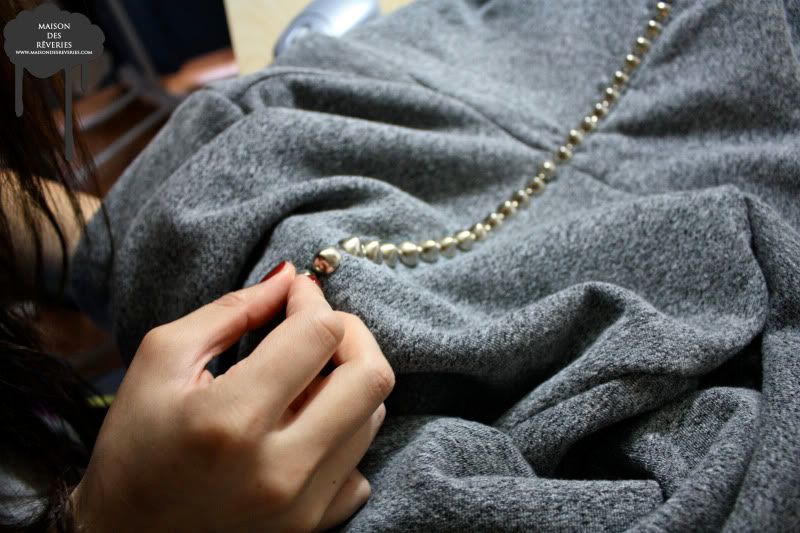
Step four: Using the column as a guide, stud inside those lines down the entire length of the back until you reach the bottom ribbing.

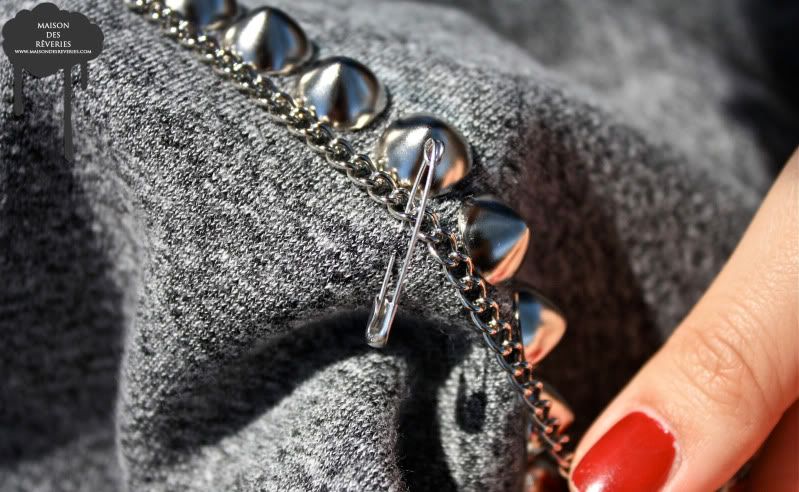
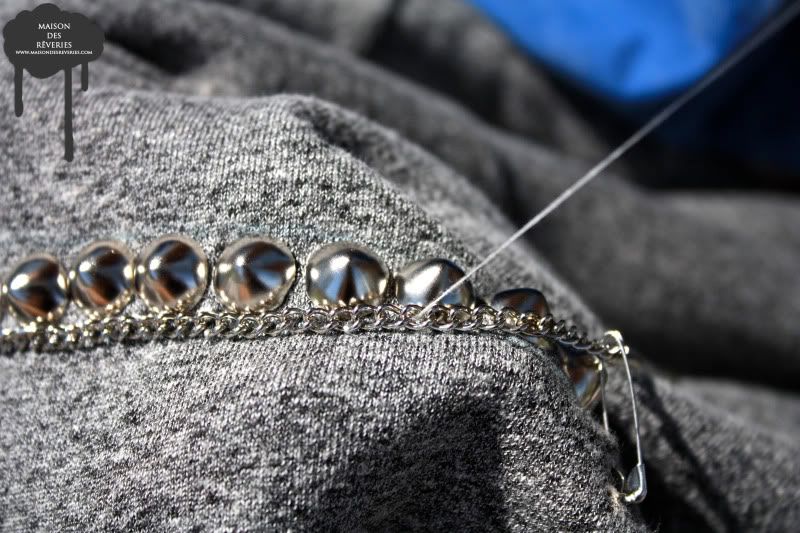
Step five: The chain should be sewn on to frame the studs. To sew on the chain, use a safety pin to hold the chain taut and flat as you are going along. Try not to pin the chain too far down from where you are working because the chain will not stay taut and straight.

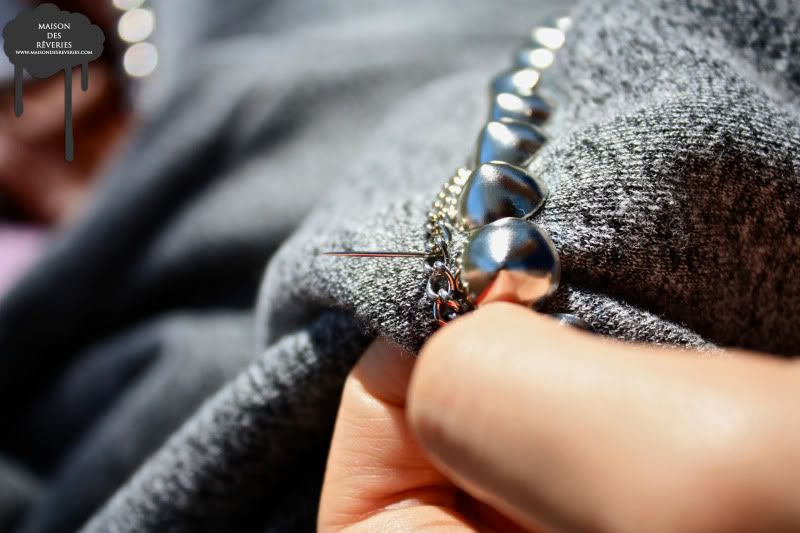
Step six: Poke the needle through the hoodie and thread it through a link of the chain.

Step seven: It is best to sew down every chain for the first few links to get it going, and then you can sew just every 2-3 links.

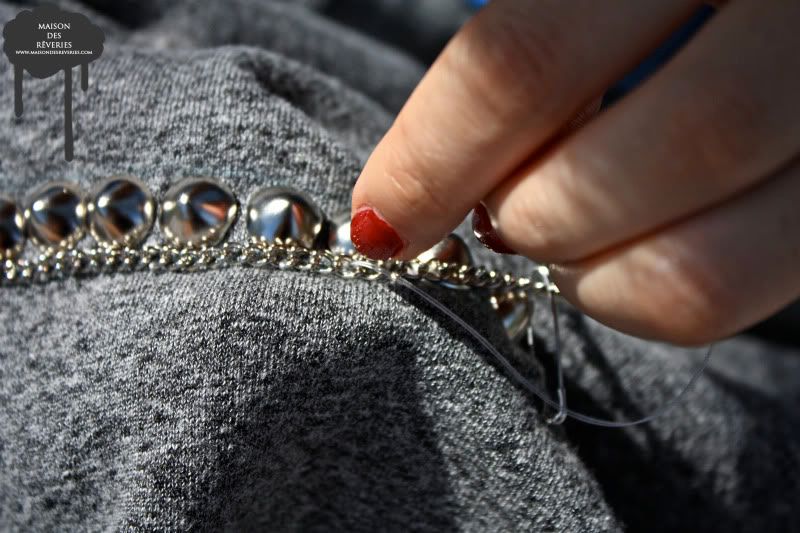
Step eight: When you are sewing the links, try to alternate from left to right as you weave in and out. If you sew only to one side, the chain will flip over towards that direction because it has nothing holding it down on the other side.

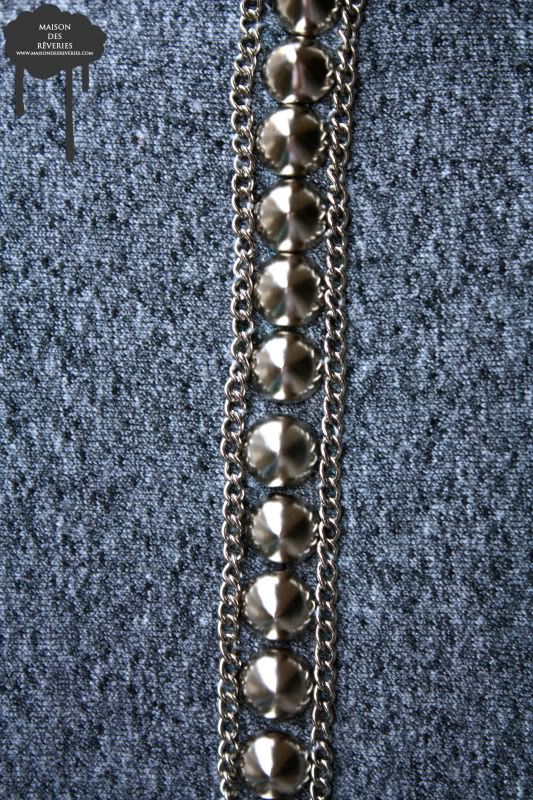
When you have finished sewing the chain down the hood, it should look something like this.


Let me know if you have any questions!!


95 comments:
amazing!!!
Wow, that looks so cool! But your hands must really hurt now - so many studs!!
that is some attitude gurl!!
so efin cool will defin try it out. thanks for sharing:)
thanks for the diy with pics! such a great project. i will definitely give this one a shot.
OMG, SO GOOD!
Definitely gonna bad-ass my hoodie!
How did you even come up with this?!
wow that is soo kickass
With my new obsession with studding anything and everything, this is deff. something I'm going to love doing.
Thank you :]
-Caitlin
i think you did a fabulous jobs with the studs and chains onto your hoodie. very very funky indeed. and the step by step tutorial is absolutely useful. love to see how u diy all your stuff.
Amazing DIY! Take a look at my blog, I tagged you :-)
that is absolutely INCREDIBLE!!
xx
Ava
http://www.aandhblog.wordpress.com
*DIES*!!! I adore this jacket. Your DIY's are the best ever!
That is so sick! I really wish I could sew, but I'm useless with a needle and thread.
U are the bes, Gennie! What a great idea!
XoXo
best
this is such an awesome idea!
annah xx
annah-logue.blogspot.com
ingenious! I can't wait to try it out myself.
I love hoodies as ul see in my posts and I really luv ur idea!!! So original!! xxxx
AMAZING DIY! (: I gotta give this a shot. I notice you started to 'mark' your photos too. Are you gonna keep doing that now? Haha random question I know!
that is SOOO BADASS
I LOOOVE this DIY, I'm totally gonna give it a shot ..
- What is the color of the hoodie called, I adore it and have been looking for a shirt that color, for a while now..!!
omg you are amazingg!
You're a genius! This is so awesome.
ohmyohmy i love this!!
i cant get over freakin amazing this is! i am utterly amazed..
Lola.
visit me sometime :)
i love this!! another amzing diy!
this is incredible. my jaw is to the floor. GREAT WORK!
Ingenious! My favorite out of all your DIY projects.
Fab as always, girl!
Oh my, by far one of the best DIY tuts I've seen! I will give it a try when I have some studds.. Hehe.
How long did it take you to make?
I envy you for your DIY studding talent ;-) I'm seriously still working on studding the lapels of my blazer to make it look like the one you did a while ago.
I obviously just don't seem to be that patient.
Also curious how long it took you.
-Velony
http://esprit-du-temps.blogspot.com
Holy crap! That is absolutely amazing! I totally admire you for all of your diy tricks, and especially for posting them up for all to see. It's incredible. So thank you for that.
That looks AMAZING!!!! The chain detail is super original, I Love it!
http://bsasjournal.blogspot.com
This is fantastic. Your hoodie looks Rich now. ha!
Great Idear! Another project on my list.. Thanks for sharing!
www.nonamenothings.blogspot.com
the best DIY i have seen in a long time, hands down. this is absolutely genius!!!! thank you for giving me more ideas with how to use up my impulse bulk-buy purchase of 500 studs-in-a-bag hahaha xoxo
wow! i love this! would love to try it out
Great work and proof that you're very patient.
Love this! Great project for the summer boredom school's end had left.
wow genni! it looks great...don't be surprised if u see lots of girls hiding behind the badass hoodie! -naiyana
oh! nicely done lady!!
This is pretty amazing. This is actually one of the best, freshest, and most original DIYs that I have seen in awhile.
So amazing...
the jacket is insane gennie! genius idea
amazing idea!
-Jason
http://www.citizencouture.com
Amazing!!! This is the best DIY ever :)
that hoodie is insane !
a diy ! youre amazing
We Were Damsels
this is amazing!!! i especially love the effect of the studding framing your face! perfect!
http://fashionhedonism.blogspot.com
good lord! you have a great designing eye! you should collborate ;)
Damn i love it,such a great idea
wow awesome idea and execution. just one question, how do you wash the hoodie with the studs?
I have a huge crush on your jacket!!
-Mads
fashionisthebestmedicine.blogspot.com
I love it! I so want to make one myself now!
awesome! i will have to do that ASAP!
p.s.
do you know some good fabric craft stores in the city, because I am seeking to create my own DIY but I need a little inspiration!
www.fashionsuite.typepad.com
THat looks so so so awesome..I wish I had the sewing skills to pull it off (I definitely do not).
http://fashionroadkill-halifax.blogspot.com
I really liked the studs on this hoodie but to be honest, I did not like the chain. I don't think if it was the type of chain that you used juxtaposed to the studs but I didn't quite like it. I was far more impressed with the mere studs and the way in which you presented them.
awesome, thanks for sharing
to those who asked questions:
- I'm not sure how long this took me other than, it took me hours :)
- Anything with studs like this you did yourself, you have to hand wash.
- Craft stores: look everywhere along the garment distrcit, there are tons!!
wow, this is amazing!!!
amazing! definitely need to try it sometime.
i've mentioned your DIY on my blog :)
OH MY LORD YOU ARE AMAZING.
you are just a DIY machine!!!
You're so creative. Your hooded sweater looks great!!!
xoxox
Nini
Definitely inspiring me to take on this DIY project. Time to go studding!
I'm new, check me out!
MonochromaticFacets.blogspot.com
Amazing, absolutely amazing. Thank you so much for your DIY posts, this one is specially useful, the pictures are great, it's so easy to understand
absolutely amazing! very talent and brilliant idea!!!
Hanh,
U rock~~ I'd say I 100% wanna give that a shot even though I know I should finish the shredded tee first...
Following u, anyways :D
Wow, this is fantastic. I can imagine, how much patience it requires... x) Look very cool.
i really dig your blog
-chris
FASHIONJINX.BLOGSPOT.COM
this is so rad! great way to livin up your standard AA hoodie...and then its stand out amongst the million other AA hoodies :)
what a great idea! i love the way you executed it as well!
I am attacking everything with studs at the moment. This looks geat, and I like how you used chain.
Looove that you added chains with the studs, takes it to a whole new level. kinda reminds me of sorta trival jewellery too, in some sense...i dunno :P how'd you ever think of studding your hoodie, genius :P
very cool! i've really been wanting to do some diy studding, but i don't know where to buy the studs? any ideas?
That is amazing. You need an award for your DIY projects--they are the best! judy
this is such a great diy!!!
Hi, I'm dying to try this out, but I think I'm gonna do gold studding on a blue hoodie - we'll see how it goes. I just love this idea, its amazing! Approximately how many studs did you use? I'm looking to buy some on the net and dont know how many to order!!
jess: i buy my studs at studsandspikes.com
zoe: I'm had 2 bags of 100 cone studs laying around. After I was finished, about half of one bag is left.. they are very cheap if you buy them online so I would say get more than you think you'll need!
I wish I had your DIY skills, but alas, I can't even tighten a loose button. So sad, eh? Fabulous job.
I've gotten so tired of ppl studding the same ideas over & over like it's something new. This is a fresh idea that I completely love!
This is freakin' amazing! Looove it.
Great posting. Thanks always for showing us your beautiful DIY projects! I love it!!! I have studded so many things, that my fingers have been hurting forever...LOL. Patience.
Have a pleasant rainy day. I want this rain to stop already in NYC.
Muahhh,
Maury
http://heightsoffashion.typepad.com/
wow! that is stunning!
That looks amazing! Great DIY x Sushi
Wow, I haven't been this amazed by a D.I.Y. in a very long time. It's fantastic! xx
SO AWESOME AND ORIGINAL!
Also...kinda creepy! But wow what a great idea, I have a friend who would die if I made her this!
No questions, you've explained - and shown- it brilliantly. I love the look, what a clever idea.
Just discovered your delightful blog thru my blog-friend Thumbelina Fashionita. Will send you an email, and am linking you soon as I post this.
That is awesome and I sent it via StumbleUpon! to the wife on her computer, I am sure one if not all the grand daughter's would love this.
WOW! This is so awesome, I'll def. be trying this soon :) Love your blog, you're really in a class of your own.
u look like a dinosaur
Wow. Amazing! Beautiful workman ship. Your photos are great.
Birgitte
I really love it ! I wanna try it ! Thanks a lot for ur perfect idea :)
Instead of marking with tailor's chalk, I sewed basting stitches down the "backbone". No danger of them getting rubbed out! Since the stitches were huge, it took almost no time. I pulled them out every six inches or so after I put the studs in.
Amazing! Except it's a little to....gothic? for me. I wonder if there'd be a way to tone it down a little......
OH MY FUCKING GOD! THIS IS BLOODY AWESOME!!! I AM SOOOO DOING THIS!!! - I will link people to your tutorial aswell :) xxx
Post a Comment